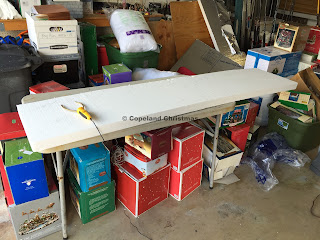
Here's our parts list and the steps we took to create the north poles. Over the years, we've seen many variations of this decoration...it's not something we invented ourselves. It's a fun project that takes a full weekend to complete and the results are pretty rewarding (at least for us).
Important: this project requires knowledge and understanding of wiring and electricity. We don't recommend that anyone use this writing as a tutorial to create your own north poles. That being said, we did consult a licensed electrician so our north poles are safe.
If we would have had to buy all the materials, the total project cost would have been around $300 for 10 north poles. Fortunately, we had a lot of the materials on hand so we only had to spend around $200.
First, here's the Home Depot shopping list. I think I ended up returning an unused can of expandable foam.
We also ordered ten 6 ft spt2 extension cords and ten cleat sockets from Amazon which look like this:
Here's the globes that we repurposed from another project.

Here's what we did......
- Sand all the barcodes and part numbers off the 3 in pvc pipes.
- Spray paint 3 inch pipes and couplers with white paint. Allow to dry overnight.
- Cut the 1/2 inch pvc pipes in half.
- Set the couplers aside for a while.
- Lay down all 20 pipes on the floor.
- Glue the small pipes inside the large pipes. Allow to dry.
- We wanted all the stripes to be identical, so we made a little template that helped with the taping.
- Spray the pipes with red paint after taping them to look like candy canes. Allow to dry overnight.
- Lay the pipes down on the floor again.
- Fish extension cords through the pipes.
- Spray expandable foam inside the pipes so that the cord and small pipe are held snugly in place. Allow time to expand and cure.
- Snip off the female ends and discard them.
- Peel the tape off
- Place couplers on the top of the pipes
- Properly wire the sockets to the cords (must be done by a person with electrical knowledge)
- Add a bulb, top with a globe.
- Pound the rebar into the grass being careful not to hit buried lines.
- Slide the north pole over the rebar.
- Run an extension cord to the north pole.

Post project thoughts...
- I kind of splurged by buying the precut 2 ft pipes, but it saved a lot of time by not having to measure, cut, and, sand the 8 or 10 ft pipes. Plus, they might not have fit in the SUV.
- I left a lot of little steps out......for example, I couldn't find 4 inch painters tape so I had to make due with 2 inch tape and just had to do twice the taping....a pain.
- I could have used red cut tape instead of the red paint....but it fades and peels in the sun. Not sure how the paint will hold up. I wonder if it will scratch off during handling.
- I could have used acetone to dissolve the codes, but it took longer and came out messier on my test subject.
- I could have added a clear coat....meh....
- We could have probably gotten away with not painting the pipes white first. But the white covered up some of the faint leftovers of the upc codes.
- Some people use multiple bulbs with different fixtures, some drill holes in the pvc and poke mini lights through them. Some people paint make the stripes differently. Some people use silicone to secure the globe. Some people use a spool of wire with vampire plugs vs repurposing the extension cords. There's so many variations of this project......
- They'll be bulky to store, so I'll probably try to find a short trash can and use some kind of foam so they don't scratch up against each other.


